
There are more than 1 billion websites in the world https://www.millforbusiness.com/how-many-websites-are-there/ and WordPress powers at least 35% of them https://w3techs.com/technologies/details/cm-wordpress/all/all.
WordPress is the biggest CMS, and with the ease of use, features, and the plethora of plugins and themes, it is only practical for more and more HTML users wanting to transition into WordPress.
In this article, we discuss everything you need to know about converting HTML to WordPress.
How to convert HTML to WordPress for beginners?
There are two ways of converting HTML to WordPress:
Method 1: Converting your HTML theme into WordPress. This means your new WordPress website will look the same as your HTML site.
Method 2: Sometimes, the first method of copying the entire design from HTML to WordPress can be overwhelming. In such cases, you can use a child theme to hold on to some design elements, even if your new WordPress website won’t look exactly the same as your HTML site.

Method 1: How to Convert the Entire Design of HTML to WordPress?
You will need to work with some codes. Don’t worry, it is pretty easy. Just follow our step by step guide.
Step 1: Create a theme folder on your computer.
Name the folder what you want to call your theme. Create these files in the folder with a code editor (Notepad will work fine).
- style.css
- index.php
- header.php
- sidebar.php
- footer.php
You don’t need to start coding just yet. Leave the files open, and we will come back to them later.
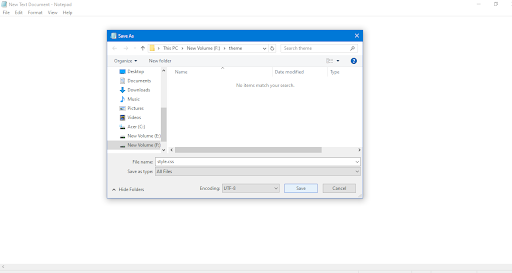
Step 2: Open style.css and add this code on the top.
/*
Theme Name: Your theme’s name.
Theme URI: Your Theme’s URI
Description: Tell something about your theme.
Version: 1.0
Author: Your name or your company credentials.
Author URI: Your website address.
*/
Since you already have a website, you should also have access to its CSS file. After adding the code above, you have to copy and paste all code from your previous CSS file to style.css.
Step 3: Copy the following code into your index.php file.
<?php get_header(); ?>
<?php while ( have_posts() ) : the_post(); ?>
<article class=”<?php post_class(); ?>” id=”post-<?php the_ID(); ?>”>
<h2 class=”entry-title”><?php the_title(); ?></h2>
<?php if ( !is_page() ):?>
<section class=”entry-meta”>
<p>Posted on <?php the_date();?> by <?php the_author();?></p>
</section>
<?php endif; ?>
<section class=”entry-content”>
<?php the_content(); ?>
</section>
<section class=”entry-meta”><?php if ( count( get_the_category() ) ) : ?>
<span class=”category-links”>
Posted under: <?php echo get_the_category_list( ‘, ‘ ); ?>
</span>
<?php endif; ?></section>
</article>
<?php endwhile; ?>
<?php get_sidebar(); ?>
<?php get_footer(); ?>
Save the file.
Step 4: In a similar fashion, you should copy the existing header, sidebar, and footer codes into your new files.
To do that, you should first know which part of your existing HTML is the header, which is the sidebar, and which is the footer.
To make it simple for you to understand, here is an example of a basic HTML website that we created.
This is the HTML code of the page:
<!DOCTYPE html>
<html lang=”en”>
<head>
<meta charset=”utf-8″>
<title> An Example Website </title>
<link rel=”stylesheet” type=”text/css” href=”style.css”>
<link rel=”stylesheet” type=”text/css” href=”assets/font-awesome.min.css”>
</head>
<body>
<div class=”container”>
<h3 style=”text-align: center;”>Example Website</h3>
<div class=”navbar”>
<ul>
<li><a href=”index.html” class=”active”>Home</a></li>
<li><a href=”sessions.html”>Sessions</a></li>
<li><a href=”events.html”>Events</a></li>
<li><a href=”howto.html”>How to Join</a></li>
<li><a href=”about.html”>About Us</a></li>
<li><a href=”contact.html”>Contact Us</a></li>
</ul>
</div>
<!– Page content –>
<div class=”main”>
<div class=”container section”>
<div class=”col-4″><p>This is a simple website that we created to let you know how you can convert an HTML website into WordPress.
</p></div>
<div class=”dance col-8″><img src=”images/studio1.jpg” alt=”image”></div>
</div>
</div?
</main>
<aside>
<!– Side navigation –>
<div class=”sidenav”>
<a href=”#”>About</a>
<a href=”#”>Services</a>
<a href=”#”>Clients</a>
<a href=”#”>Contact</a>
</div>
</aside>
<div class=”foot col-12″>
<div class=”copyright col-6″>
<span>Copyright © </span>
<strong>Your company name</strong><br>
<span>All rights reserved.</span>
<div class=”clear”>Template Designed By Your Name</div>
</div>
<div class=”social col-5″>
<div><b>Stay Connected</b></div>
<ul>
<li><a href=”#”><img src=”Images/facebook.png” alt=”icon”></a></li>
<li><a href=”#”><img src=”Images/insta.png” alt=”icon”></a></li>
<li><a href=”#”><img src=”Images/youtube.png” alt=”icon”></a></li>
<li><a href=”#”><img src=”Images/twitter.png” alt=”icon”></a></li>
</ul>
</div>
</div>
</div>
</body>
</html>
Step 4.1: Copying the Header Code.
The HTML code of your website won’t be the same as the example we provided above, but it will use the same tags like <html>, <head>, <body>.
Now, from your HTML code, highlight everything from the start of the opening <main> tag, and copy it to the header.php file that you created.
Also, copy this code <?php wp_head();?> just before the </head> tag. This will ensure WordPress plugins will work properly.
The header.php file will look like this after we copy it from the website.
<!DOCTYPE html>
<html lang=”en”>
<head>
<meta charset=”utf-8″>
<title> An Example Website </title>
<link rel=”stylesheet” type=”text/css” href=”style.css”>
<link rel=”stylesheet” type=”text/css” href=”assets/font-awesome.min.css”>
<?php wp_head();?>
</head>
<body>
<div class=”container”>
<h3 style=”text-align: center;”>Example Website</h3>
<div class=”navbar”>
<ul>
<li><a href=”index.html” class=”active”>Home</a></li>
<li><a href=”sessions.html”>Sessions</a></li>
<li><a href=”events.html”>Events</a></li>
<li><a href=”howto.html”>How to Join</a></li>
<li><a href=”about.html”>About Us</a></li>
<li><a href=”contact.html”>Contact Us</a></li>
</ul>
</div>
<!– Page content –>
<div class=”main”>
Step 4.2: The Sidebar
Copy everything between <aside> to </aside> in your HTML code to sidebar.php. This is the portion in the above example.
<aside>
<!– Side navigation –>
<div class=”sidenav”>
<a href=”#”>About</a>
<a href=”#”>Services</a>
<a href=”#”>Clients</a>
<a href=”#”>Contact</a>
</div>
</aside>
Step 4.3: Configuring Footer.php
Copy everything after the <aside> element into the footer.php file. Also, add <?php wp_footer();?> just before the </body> tag.
<div class=”foot col-12″>
<div class=”copyright col-6″>
<span>Copyright © </span>
<strong>Your company name</strong><br>
<span>All rights reserved.</span>
<div class=”clear”>Template Designed By Your Name</div>
</div>
<div class=”social col-5″>
<div><b>Stay Connected</b></div>
<ul>
<li><a href=”#”><img src=”Images/facebook.png” alt=”icon”></a></li>
<li><a href=”#”><img src=”Images/insta.png” alt=”icon”></a></li>
<li><a href=”#”><img src=”Images/youtube.png” alt=”icon”></a></li>
<li><a href=”#”><img src=”Images/twitter.png” alt=”icon”></a></li>
</ul>
</div>
</div>
</div>
</body>
</html>
Step 5: Zip all the files into a theme folder.
For that, you can download 7zip https://www.7-zip.org/download.html. Here is a resource on how you can zip your files with the software. https://www.inmotionhosting.com/support/website/compress-file/.
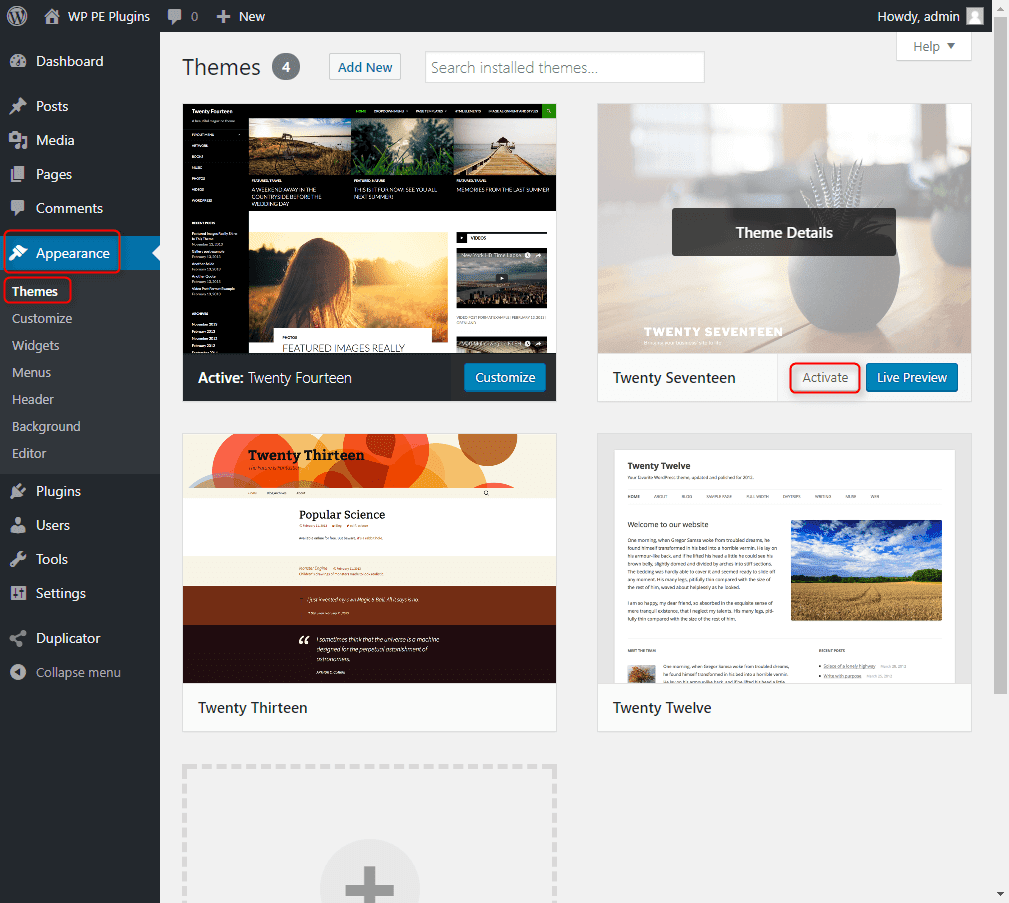
After you are done, save all the files and close them. Go to your WordPress Admin Dashboard. Click on Appearance>Themes>Add New>Upload Themes. Select the zip folder that you made in the above step, and click on Install Now.

After you upload your theme, On your dashboard, go to Appearance>Themes, and activate it.
Method 2: How to Build a WordPress Website from a Child Theme?
A child theme is built on the top of another theme. When you install a child theme, the design of the website may change, but the core structure will be the same.
Follow these steps to build a WordPress Child Theme for your HTML website:
Step 1: Choose an appropriate theme for your WordPress website.
Step 2: In your computer, create a theme folder. The name of the folder should be the name of the theme in lowercase without space, followed by a suffix -child.
For example, if the name of the theme is Madd Magazine, then your folder name should be maddmagazine-child.
Step 3: Create a file style.css on your folder. You can do it with any code editor software, or even Notepad. Copy the following code and save the file:
/*
Theme Name: The Name of the Theme, Followed by a Child (For example, Madd Magazine Child)
Theme URI: Your Theme’s URI
Description: Tell something about your theme.
Version: 1.0
Author: Name of the author who created the parent theme.
Author URI: Your website address.
License: GNU General Public License v2 or later
License URI: http://www.gnu.org/licenses/gpl-2.0.html
Text Domain: madd-magazine-child (Replace it with the name of the theme you choose)
*/
Step 4: Create another file called functions.php and copy the same exact code as in style.css.
Step 5: Convert the folder into a zip with 7 Zip, and upload the child theme to your WordPress Site and publish it.
Conclusion:
The ever-straightforward WordPress User Interface and tools make designing and publishing more convenient as compared to classic HTML.
Furthermore, 7481 WordPress themes https://wordpress.org/themes/browse/popular/ give you a lot of options on how your websites can look, and with 50,000 plugins https://wp-rocket.me/blog/wordpress-plugins-many/ you have an abundance of tools for publishing and analysis when you use the CMS.
The above information should be enough for you to convert HTML to WordPress. If you still have questions or inquiries, you can contact Growth Pro, and we will do our best to help you out.